KVB
In order to build, for simulation, a railway safety device, the KVB (Automatic Speed Control, with a K instead of C), I had to develop both software: PC side (and simulator) and device side (Arduino).
For the creation part (design, 3D printing, electronics, assembly), I refer you to the dedicated article on my blog.
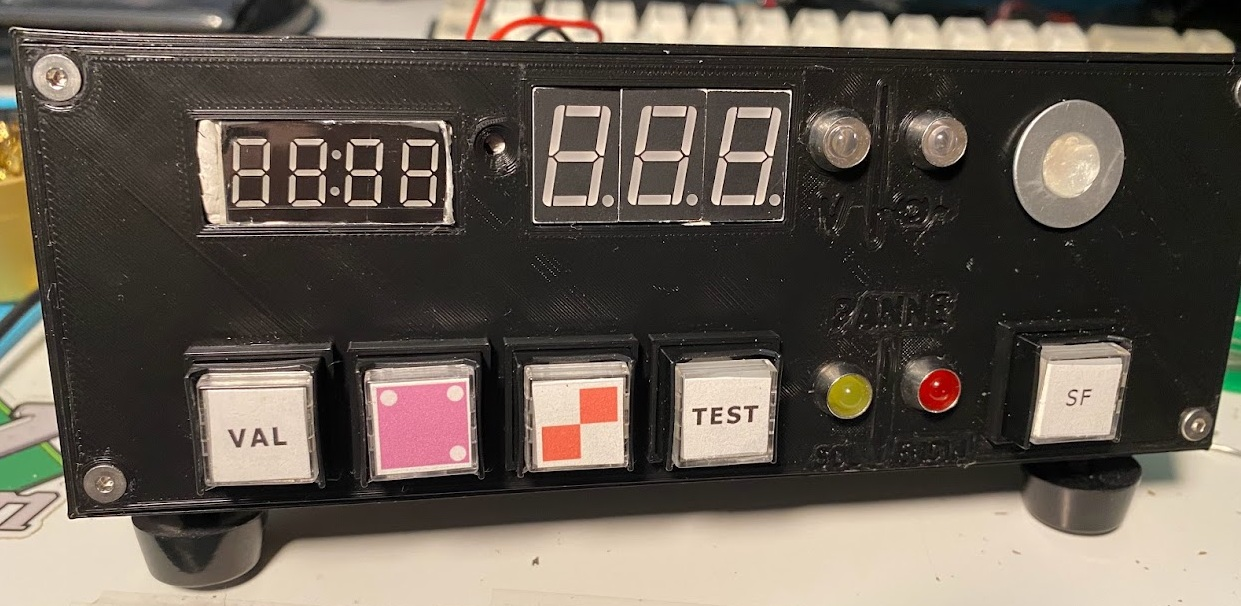 Photo of the finished assembly, the case is entirely designed and 3D printed. I no longer use this exact case, I managed to find a real KVB case.
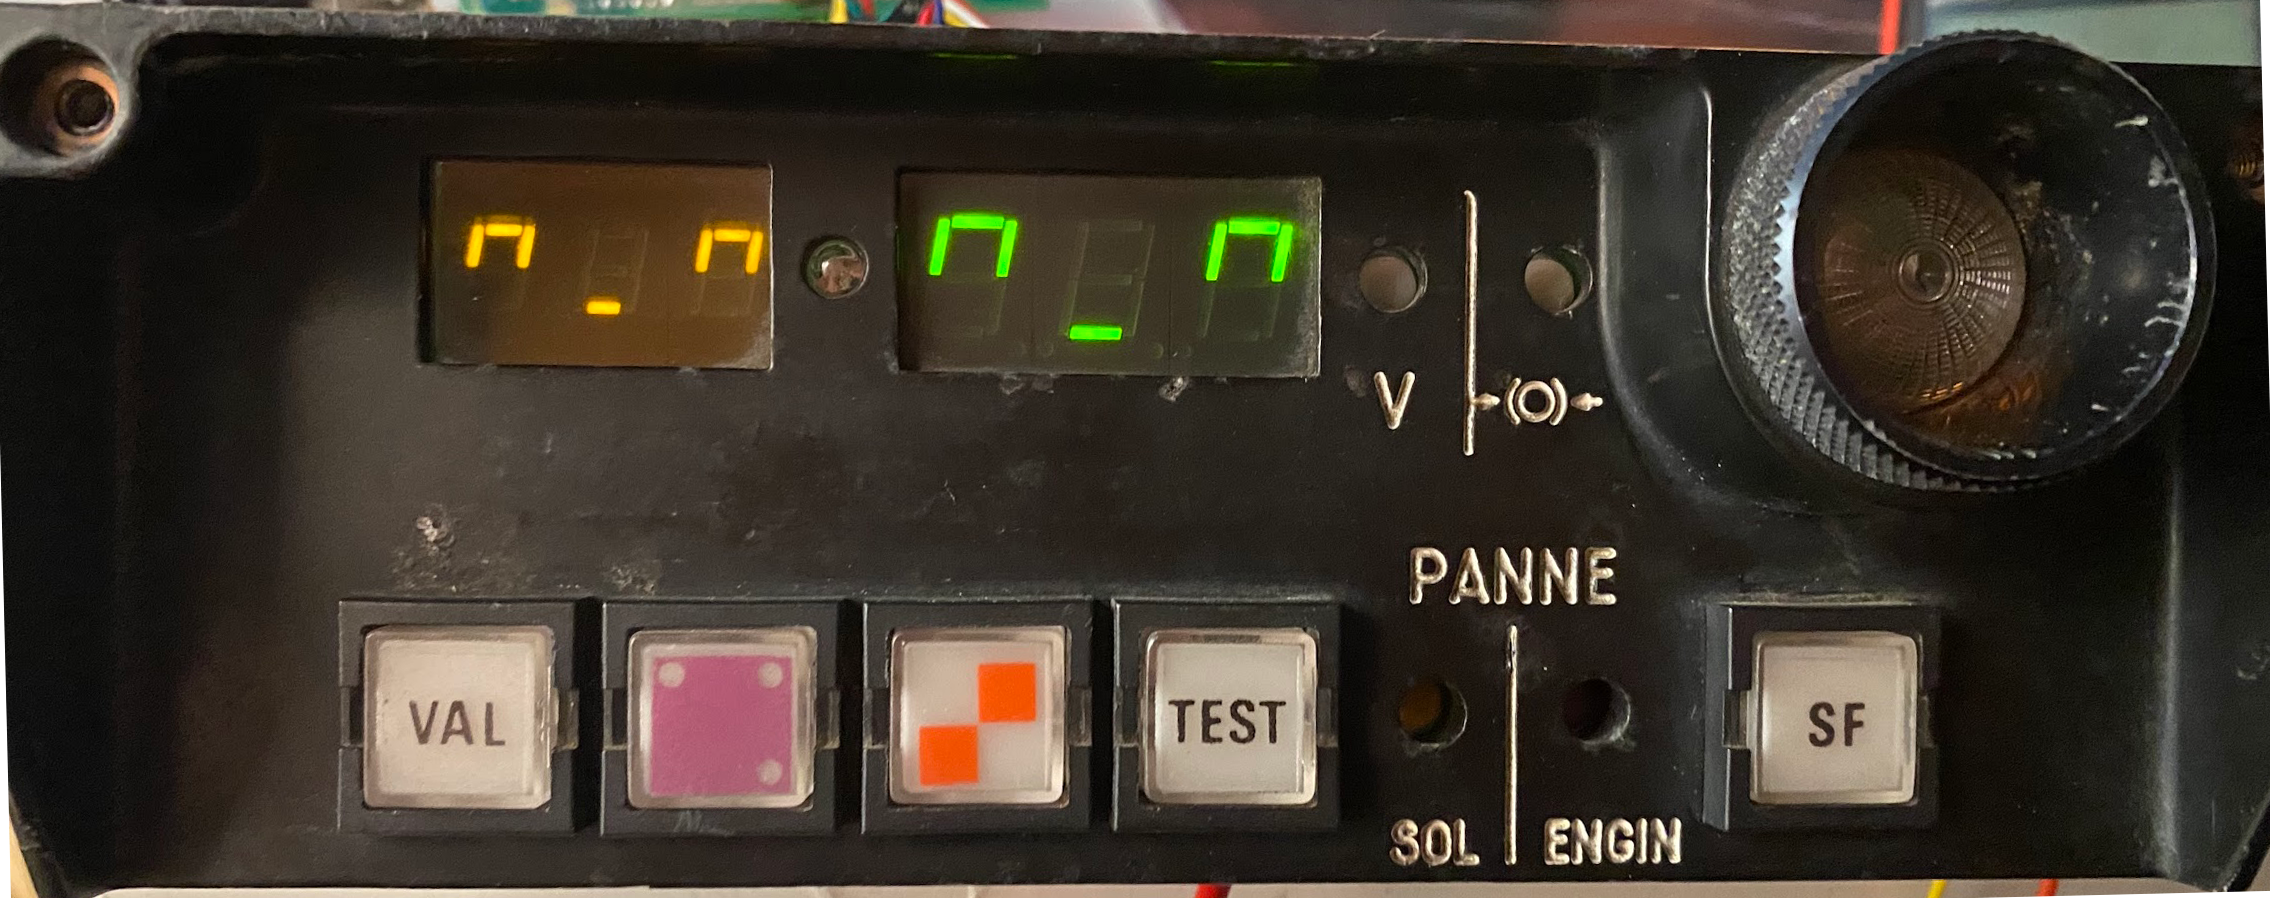 Photo of the "real" functional KVB
The old model used an STM32F103C8T6, aka the cheapest STM32 on the market, which cost 1€60 (including shipping!) at the time. However, the COVID-19 pandemic and the shortages that followed particularly affected ST Microelectronics. Chips therefore increased in price. Where a devboard now costs about 3€ (including shipping), the price had exploded to almost 6€/unit, in July 2021.
I therefore chose to go back to a well-known base: the Arduino Mega 2560. This allowed me to reduce the production cost, and simplify development.
Arduino Part
For the "version 2" project, I chose to complicate my life, especially for the technical challenge: instead of simply sending a serialized JSON object via serial, I chose to make a binary protocol. This allowed me to reduce the size of messages, and therefore reduce transmission time. However, there are not only advantages: debugging is more complicated, the code is harder to write, and you really have to pay attention to synchronization.
It was a very enriching experience, but I don't know if the binary protocol is really necessary. That said, I'm very happy with the result, and I'm very proud of my code.
The code is available on my GitHub.
Libraries
I used several libraries for this project:
- AceTMI and AceSegment for display on 7 segments, which use TM1637 displays.
- Bounce2 for buttons.
Custom Binary Protocol
Each frame consists of 4 bytes:
- The first byte is a header, always 0x23. This allows "synchronizing" the communication.
- The second byte is a byte that indicates what kind of data it is (lamp state, buttons pressed, etc).
- The third byte is the information byte itself. This means we only transmit one "useful" byte
- The fourth byte is a checksum, which allows verifying that the frame was not corrupted during transmission. This checksum is simply the sum of the first 3 bytes.
If a correct frame is received, we send an ACK (0x24) in return. If an incorrect frame is received, we don't respond. This has the disadvantage of not allowing to know if the frame was received correctly, but especially: we can only with difficulty know if the KVB is desynchronized with the PC (or vice versa!). In theory, this can never happen, but this is not at all the case in practice.
The protocol efficiency is therefore 25%, but this doesn't bother me: the KVB doesn't need a lot of data, and the transmission time is very short.
PC Part
Train Simulator only running on Windows, I therefore made the choice of development in C++ and a console application. The code is available on my GitHub.
I chose to split the code into several projects (solutions) for clarity:
RailDriverLibis a library that allows communication with Train Simulator. It exposes the Train Simulator API, and allows communication with the simulator.RailDriverClientis a test application for theRailDriverLiblibrary. It allows testing the library's functionalities, and seeing if it works correctly.
KVBProtocolLibis a library that allows communication with the KVB. It exposes an API to communicate with the KVB, and allows communication with the KVB.KVBProtocolClientis a test application for theKVBProtocolLiblibrary. It allows testing communication with the KVB.KVBClientis the main application. It uses both libraries to communicate with the KVB and Train Simulator.
I chose to split the code into several projects for clarity, and to be able to reuse the libraries in other projects, even if I doubt that will ever happen. The code is under Unlicense license, so you can use it as you wish.
Configuration File Management
I chose to store the configuration in an INI file: they are natively supported by Windows, and are very simple to manipulate. However, these are "C-style" methods that require passing an array.
Qt Application
One of the substantial advantages of a simple text protocol is debugging: you can see what is sent and received with a simple serial terminal. However, this is not possible with a binary protocol. I therefore chose to make a Qt application to be able to see what is sent and received.
I used Qt with .ui files (with Qt Creator), because I don't need to make a very complex application.
Conclusion
This project was very enriching, and allowed me to discover new things. I learned to make a binary protocol and to split a project into several parts. I also learned to use third-party libraries (AceTMI/AceSegment), and to make console applications in C++ for Windows. Thanks to Qt, I also learned to make cross-platform graphical applications.